Once you immerse yourself in the world of laser engraver, you are almost certainly going to become hooked, especially when you consider the almost endless possibilities for creating items that you will be proud to say you have made.
It’s easier than ever before to get started, especially when you invest in something like a portable laser engraver that is user-friendly, and cost-effective to purchase. Before you dive straight into using your new engraver, it makes sense to learn a few essentials about the art of engraving.
With a bit of prior knowledge, you can avoid some classic rookie errors, and start to make the most of your investment as quickly as possible. Here are some essentials that you need to know before you get started.
Know your laser engravers
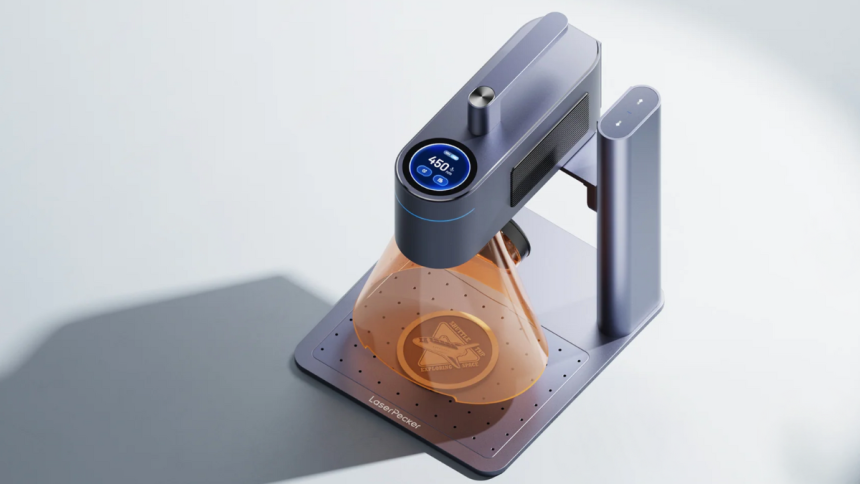
A good place to start would be to appreciate that not all laser engravers are created equal. In general, the type of laser you choose will often dictate what materials you can work with and how detailed your engravings can be.
There are three common types of laser that you will most likely be choosing from. These are CO2 lasers, fiber lasers, and a diode laser.
CO2 lasers are great for working on non-metal materials like wood, acrylic, leather, fabric, and glass. It is a highly versatile option and should prove ideal for most of your initial requirements and skill level.
Fiber lasers are designed specifically with the intention of being used to engrave metals such as stainless steel, aluminum, and brass. You will find that these machines tend to be more expensive. You will most likely find them in an industrial setting, or when you have high-precision needs.
Diode lasers are a budget-friendly option, They are smaller, and work well if you are planning to do light-duty engraving on wood, leather, and some plastics. A diode laser would be an excellent choice if you are a beginner.
Understand what materials are most suitable for engraving
Although laser engraving can be done on a wide range of materials, it’s important to know what’s safe to work on, and what’s not.
Some of the best materials to use for engraving are most types of wood, leather, acrylic, paper and cardboard, plastics that carry a laser-safe label, and anodized aluminum.
There are some materials that you should definitely avoid using.
PVC is not a good option as it releases toxic chlorine gas. ABS plastic tends to melt, and also delivers poor results. Using polycarbonate results in a poor finish, and can produce harmful fumes. In addition, avoid certain foams and synthetic fabrics as they can ignite or emit fumes.
Bottom line, check with your supplier, or someone who knows what’s safe and suitable to work with.
Good ventilation and excellent safety protocols are non-negotiable
Remember, laser engraving has the potential to create smoke, fumes, and even potentially harmful particles, especially when engraving plastics or leather. That’s precisely why you always need to work in a properly ventilated environment.
It is also essential that you wear protective eyewear, especially if your laser is an open model. Operating a laser engraver is perfectly safe, provided you follow the right health and safety protocols at all times.
Appreciate the importance of good design software
You’ll need compatible software to design and send files to your laser engraver. With that in mind, you will usually discover that most machines work with vector and raster files from programs like LightBurn, Inkscape, LaserGRBL, and Adobe Illustrator.
Do your research to find out which of these software options is most suited to what you want to do with your engraver.
Learning how to use these tools to create clean vector graphics, adjust layers, and fine-tune your design settings is key to successful engraving.
Be mindful that not all files are ready for engraving
It’s all too easy to make the assumption that any image file will work, but not all graphics are laser-ready. Raster images, such as JPGs and PNGs can be engraved, but they need to be high resolution and may require initial editing. Vector files are generally the preferred option because they allow for cleaner, scalable results.
You’ll also need to set different layers for cutting compared to engraving, as well as adjusting speed and power settings. There is also a scenario where you might decide to convert your images to grayscale or black and white for better definition.
It pays to know that engraving isn’t just for flat surfaces
It makes sense to start with flat items like coasters, signs, and cutting boards, but that’s just the beginning of your creative adventures. With the help of accessories like rotary attachments, you can engrave curved objects like tumblers, mugs, and bottles.
This opens up a dazzling array of manufacturing possibilities, allowing you to work on ideas for jewelry, all sorts of leather products, like belts and wallets, glassware, and even phone cases.
Once you get the hang of using your engraver, the possibilities are nearly endless.
Dialing in your settings takes practice
It’s only natural that your engraving skills will improve over time. When you learn to appreciate that every material, thickness, and machine model reacts differently to laser power, speed, and focus, it makes your creative journey easier.
There’s no universal setting that works every time. For that reason, you might want to start a project with some test engraving to make sure everything works.
What you are looking to do with your test engraves is to learn how to adjust your laser power, engraving speed, line spacing, and pass count. This is a great way to hone your skills without being too wasteful.
You might also want to follow the lead of many users, who create a test grid, which is also sometimes referred to as a power-speed matrix. This is an excellent way to expediently find the best settings for each material.
Bottom line, the more you experiment and take notes, the faster you’ll find your groove.
Always have a focus on ongoing maintenance
Maintaining your equipment is essential. The good news is that laser engravers don’t require heavy maintenance, but neglecting your machine can shorten its lifespan and cause poor results.
The sort of regular maintenance practices to consider includes cleaning mirrors and lenses, removing debris and residue from the engraving bed, and lubricating all moving parts in accordance with your users manual. It is also a good idea to regularly check alignment and calibration settings, and update firmware and software when prompted.
Your hobby could soon become a business
Laser engraving is huge fun, and it’s also a practical entry point into product making or small-scale manufacturing. There are lots of hobbyists who end up turning their passion into a side hustle or full-time gig.
A laser engraver is one of the most creative tools you can add to your home workshop. But getting started takes more than just plugging in your machine. You need to understand your tools, your materials, and how to work safely and effectively.
Get started today and see where it takes you.
Lynn Martelli is an editor at Readability. She received her MFA in Creative Writing from Antioch University and has worked as an editor for over 10 years. Lynn has edited a wide variety of books, including fiction, non-fiction, memoirs, and more. In her free time, Lynn enjoys reading, writing, and spending time with her family and friends.