Creating before and after restoration edits can be a powerful way to capture your audience’s attention. Whether you’re working on a property restoration, an art transformation, or even a makeup makeover, these types of videos show the magic of change. But what really makes these edits stand out is how you present the transformation. Using the right video editing tools can make all the difference, and CapCut’s features like text to speech are essential for enhancing your storytelling and engaging your viewers right from the start.
In this blog post, we’ll go over how to make before and after restoration edits that instantly hook viewers and how to use tools like AI video generator and voice changer to take your edits to the next level.
The Power of Before & After Edits
Before and after edits are incredibly popular on social media and video platforms like YouTube and Instagram. Why? Because they grab attention quickly and evoke strong emotions. People love seeing transformations, whether it’s a house being restored, a piece of artwork being cleaned up, or someone’s appearance changing dramatically. These videos tell a story of improvement and hope, which is why they’re so effective in engaging audiences.
The key to a great before and after edit is in how you structure the video. The “before” part sets the stage, showing the problem or the condition of something before restoration. The “after” part reveals the results, and that’s where the magic happens. To keep your viewers hooked, it’s crucial to add a personal touch. This can be done by adding narration or music, and text to speech is a great way to add an extra layer of storytelling.
How to Create Stunning Before & After Edits Using CapCut
CapCut makes it incredibly easy to create impressive before and after edits. Here’s a simple step-by-step guide on how to get started with CapCut:
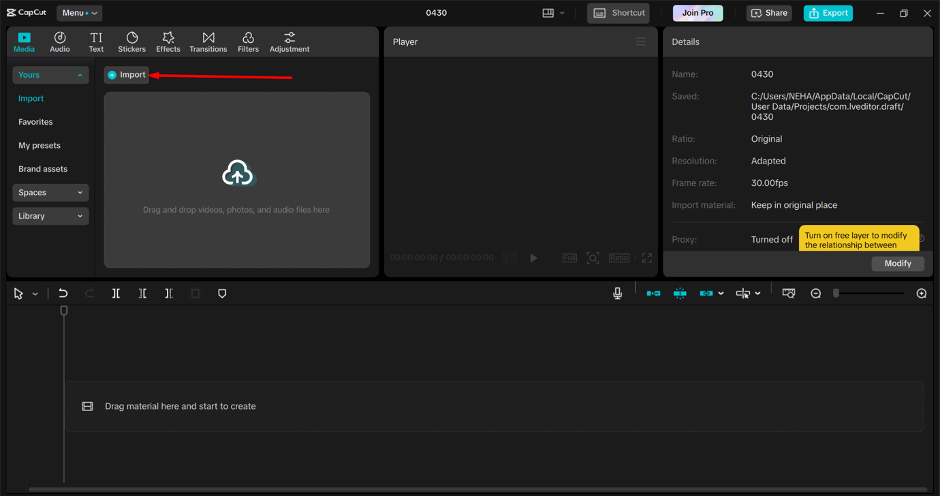
Import Video
To begin, you’ll need to import the footage you want to use. Open the CapCut desktop editor and create a new project. Then, import the video files, photos, or scanned sketches you want to include in your before and after transformation. Once uploaded, you can drag them into the timeline in the order you want them to appear.
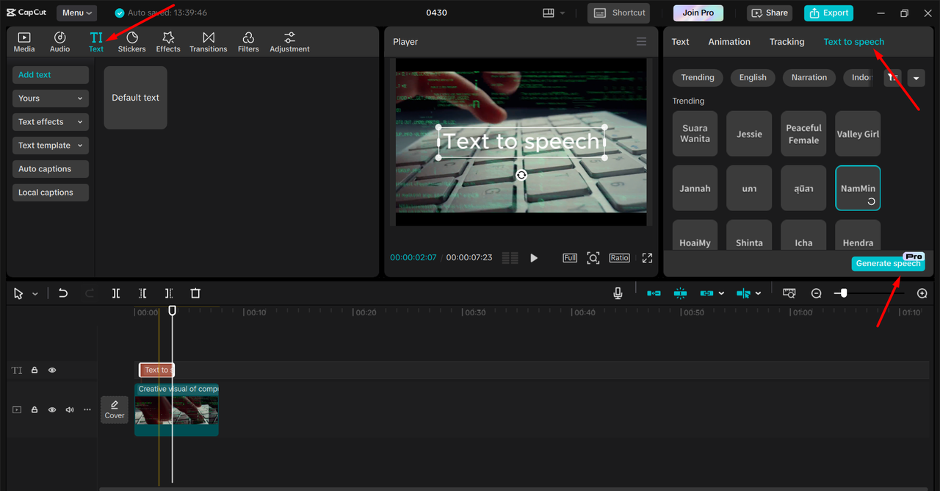
Convert Text to Speech
Now that your visuals are ready, you can enhance them with narration. Narration can help guide the story of the restoration or transformation, making it more engaging for your viewers.
To add narration in CapCut, click on the “Text” option, and then select “Add Text.” Type in the text that you want to be read out loud. Then, right-click the text box and choose “Text-to-Speech.” You’ll have the option to select a voice (male or female) and adjust the speed of the narration. This is a great way to bring your video to life without needing to record audio separately.
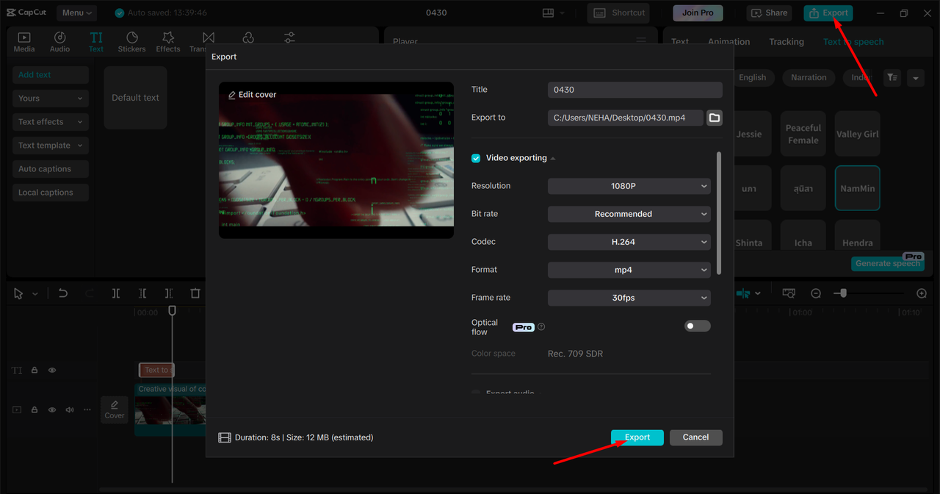
Export Video
Once you’re happy with your edits and your narration, it’s time to export your video. Click on the “Export” button and choose the settings you want. For the best quality, it’s recommended to export your video in 1080p. After the video is exported, save it to your computer and share it online. Now your before and after restoration video is ready to grab attention!
Adding Impact with AI Video Generator
Sometimes, creating stunning before and after edits can require more than just basic cuts and transitions. That’s where an AI video generator comes in. This tool can be a game-changer when it comes to automating complex effects and making your edits more engaging.
An AI video generator can help you add effects like automatic color correction, dynamic transitions, or even suggest different ways to present the before and after shots. These effects help make the transformation more dramatic and impressive, which keeps viewers watching until the very end.
By integrating AI-powered effects into your video, you can ensure that the transformation looks smooth and visually appealing. It’s like having a professional editor working alongside you, but faster and without the hassle. The best part? The AI video generator helps you create professional-quality content with minimal effort.
How to Enhance Your Video with Voice Effects
The power of sound and narration is often underestimated, but it can significantly enhance the emotional impact of your before and after edits. A well-timed voiceover or sound effect can make the transformation feel even more dramatic.
CapCut offers a voice changer feature that can help you add extra effects to your voiceover. This feature allows you to change the pitch of your voice, adjust the tone, or even add fun effects like echo or robot voices. Whether you want to make your narration sound more dramatic, humorous, or simply different, the voice changer can help.
By adjusting the voice, you can match the tone of the video to the transformation. For example, if the video is about restoring a vintage car, a deeper or more serious tone might suit it. If it’s a fun makeover, a lighthearted voice might be more fitting.
Conclusion
Creating before and after restoration edits that hook viewers instantly is all about using the right tools and presenting your transformation in an engaging way. CapCut offers powerful features like text to speech, AI video generators, and voice changers, all of which can enhance your videos and make them stand out.
Whether you’re restoring an old piece of furniture, revamping a house, or showcasing any type of transformation, these tools will help you tell a compelling story that keeps viewers coming back for more. So, go ahead and experiment with these features, and start creating your own captivating before and after restoration videos today!
Lynn Martelli is an editor at Readability. She received her MFA in Creative Writing from Antioch University and has worked as an editor for over 10 years. Lynn has edited a wide variety of books, including fiction, non-fiction, memoirs, and more. In her free time, Lynn enjoys reading, writing, and spending time with her family and friends.