Introduction
HappyHorse AI is a next-generation AI video generation model designed to create video and audio simultaneously in a single unified process. Unlike traditional tools that generate visuals first and then attach sound, it synchronizes both from the start, producing more coherent cinematic output.
This matters because most AI-generated videos fail due to:
- weak lip-sync alignment
- delayed or mismatched audio
- unnatural sound timing
HappyHorse AI solves this by treating audio and video as a single generation system rather than two separate steps.
In practice, this makes it more suitable for creators who want fast cinematic content without heavy post-production work.
What Makes HappyHorse AI Different
The core innovation is native joint audio-video generation, where both modalities are created in one pass instead of being layered later.
Key advantages:
- synchronized dialogue and lip movement
- natural ambient sound generation (footsteps, environment, effects)
- improved cinematic continuity
- reduced editing workload
Unlike traditional pipelines, audio is not “added” — it is generated together with visuals from the same model process.
However, it is important to stay realistic:
- audio quality is not always studio-level
- fast motion scenes can still produce artifacts
- long-form consistency is still evolving
So this is advanced tech — not a fully stable film-production replacement.
Step 1: Choosing Input Method
1. Text-to-Video (Full Control Mode)
You describe the entire scene in detail:
- environment
- characters
- actions
- camera movement
- dialogue + sound
Example:
A cinematic rainy city street at night, neon lights reflecting on wet roads, a man walking slowly, camera tracking behind him, soft rain sound and footsteps, he says: “This is my moment.”
Best for:
- storytelling
- cinematic scenes
- creative freedom
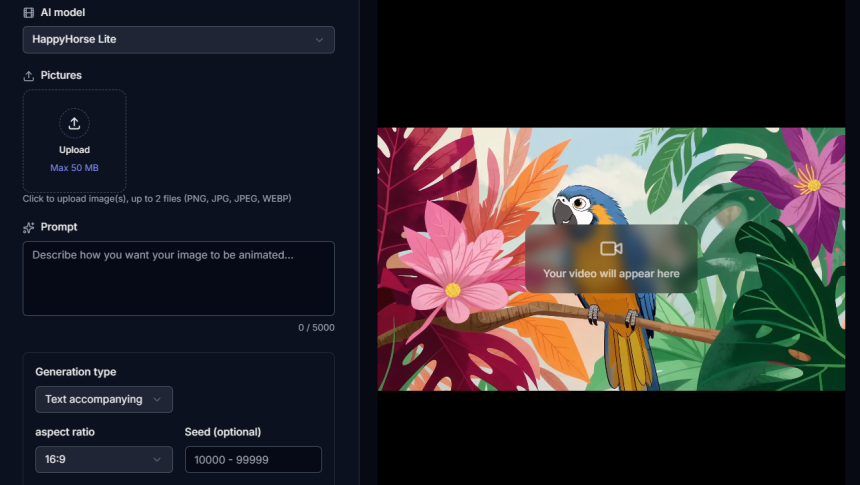
2. Image-to-Video (Consistency Mode)
You upload an image and the AI animates it:
- adds motion
- camera movement
- depth and scene dynamics
- ambient sound
Best for:
- marketing visuals
- character consistency
- quick animation workflows
3. Multi-Modal Input (Advanced Mode)
Combines:
- images
- text prompts
- optional audio references
Best for:
- professional-level control
- complex scene building
- advanced creators
Step 2: Writing Effective Prompts (Most Critical Part)
Prompt quality directly decides output quality.
Weak Prompt:
A man walking in a city.
Strong Prompt:
A cinematic night city street with neon reflections, a man walking slowly in the rain, camera tracking behind him, footsteps echoing on wet ground, soft traffic ambience, he whispers: “I will make it.”
Why this works:
- clear environment
- defined motion
- camera direction
- audio instructions included
👉 In AI video generation, unclear prompts = random output.
Step 3: Output Settings Optimization
Before generating:
- Resolution: 1080p (recommended)
- Duration: 5–10 seconds (most stable range)
- Aspect ratio:
- 16:9 → cinematic
- 9:16 → social content
- Style: cinematic / commercial / anime
Important truth:
👉 Longer videos = higher instability risk
Step 4: Generation Process (What Happens Internally)
The system processes:
- scene understanding
- motion generation
- audio synthesis
- audio-video synchronization
Expected results:
- visually strong output
- slightly imperfect motion in early iterations
- atmospheric rather than studio-grade audio
This is normal for current-generation AI systems.
Step 5: Refinement Strategy (Where Quality Improves)
Single generation is rarely enough.
Improve results by adjusting:
- camera stability
- lighting consistency
- motion smoothness
- dialogue clarity
- ambient sound balance
👉 Real quality comes from iteration, not first output.
Step 6: Reference-Based Control (Advanced Workflow)
You can use references to improve accuracy:
- image reference → keeps character identity
- video reference → replicates motion style
- audio reference → controls tone and rhythm
This shifts the tool from “generator” to controlled production system.
Comparison: HappyHorse AI vs Other AI Video Models
| Feature | HappyHorse AI | Typical Competitors |
| Audio-video generation | Unified system | Separate pipeline |
| Lip-sync accuracy | High (short clips) | Variable |
| Motion stability | Strong in short scenes | Strong in long scenes |
| Audio quality | Moderate | Often more refined |
| Control flexibility | Medium-high | High (enterprise tools) |
Key insight:
- HappyHorse excels in fast cinematic output
- competitors often excel in long-form production control
Common Mistakes That Kill Output Quality
Avoid these:
- vague prompts
- no audio description
- overly long video settings
- expecting perfect first result
- ignoring iteration process
👉 Most failures are user-side, not model-side.
Why HappyHorse AI Matters
This model represents a shift toward:
- unified multimedia generation
- faster content pipelines
- reduced editing dependency
- AI-assisted filmmaking workflows
But the reality:
👉 It is still evolving and not a final production-grade system.
Final Verdict
HappyHorse AI is a powerful tool for cinematic short-form video generation with synchronized audio and visuals. It delivers strong results when prompts are well-structured and settings are properly optimized.However, it is still an evolving system and not fully reliable for long-form or high-end professional production workflows.In the end, the quality you get is directly tied to your understanding of how to use HappyHorse AI effectively—those who master prompt design, input control, and refinement will consistently achieve far better cinematic outputs than average users.
Lynn Martelli is an editor at Readability. She received her MFA in Creative Writing from Antioch University and has worked as an editor for over 10 years. Lynn has edited a wide variety of books, including fiction, non-fiction, memoirs, and more. In her free time, Lynn enjoys reading, writing, and spending time with her family and friends.