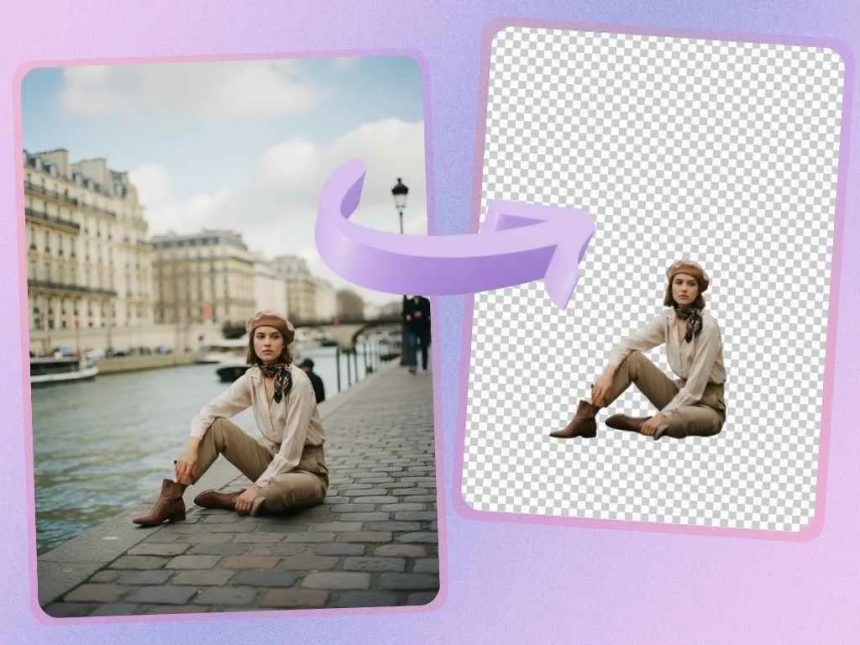
Modern creators face a constant demand for fresh content and high-quality visuals. The pressure to produce unique art every day can lead to burnout or creative blocks. Many artists and designers now turn to an ai image editor to speed up their creative process. These tools allow users to modify existing pictures or create brand new ones using simple text prompts and reference images.
The ability to transform a rough sketch into a polished masterpiece is a significant advantage for any digital artist. Using image to image ai free online platforms makes this technology accessible to everyone without requiring expensive hardware. You can upload a basic drawing and watch as the software interprets your lines and colors to create a professional-grade illustration. This process saves hours of manual painting and allows for more experimentation.
Digital marketing professionals also find these tools incredibly useful for social media campaigns. Instead of starting from a blank canvas for every post, they can use a base image and apply different styles to fit various brand aesthetics. This approach ensures visual consistency while still providing enough variety to keep the audience engaged. The speed of generation means a marketing team can test multiple visual concepts in a single afternoon.
Use Case 1: Character Design and Concept Art
Concept artists often need to generate dozens of ideas for a single character or environment. In the past, this meant drawing every variation by hand, which took a lot of time and effort. Now, an artist can create one solid base character and use AI to explore different outfits, lighting conditions, or art styles. This method keeps the core structure of the character the same while changing the details that matter for the story.
The main benefit here is the ability to maintain structural integrity. When you provide a reference image, the AI understands where the head, arms, and legs are located. It does not just guess based on a text prompt. This level of control is vital for professional work where the character must look like the same person across different scenes. You can change a character from a fantasy knight to a space marine while keeping the same facial features and pose.
Another benefit is the exploration of color palettes. An artist might be unsure if a character looks better in blue armor or red leather. By using a reference image, they can quickly swap colors and materials without repainting the entire piece. This allows for a more fluid creative process where the artist acts more like a director and less like a manual laborer.
Use Case 2: Interior Design and Architecture
Architects and interior designers use these tools to show clients what a space could look like before any construction begins. A designer can take a photo of an empty, gray room and use AI to fill it with furniture, lighting, and decorations. This helps clients visualize the final result much better than a flat blueprint or a simple 2D sketch. It bridges the gap between a professional vision and a client’s imagination.
The primary benefit in this scenario is cost reduction. Creating high-end 3D renders usually requires expensive software and specialized technicians. With AI tools, a designer can produce several high-quality mockups in minutes. If a client wants to see the room in a minimalist style instead of a rustic one, the designer can make that change instantly. This responsiveness builds trust and helps close deals faster.
Furthermore, these tools help in the early stages of brainstorming. A designer might have a rough idea for a building shape. They can sketch it on a piece of paper, snap a photo, and use the AI to generate a realistic building facade based on that sketch. It allows for rapid prototyping of ideas that would otherwise stay trapped in a sketchbook.
Use Case 3: E-commerce and Product Photography
Small business owners often struggle with the high cost of professional product photography. Taking a photo of a product is easy, but making it look like it belongs in a high-end magazine is difficult. E-commerce sellers use AI to take a simple photo of their product and place it in various professional settings. A bottle of soap sitting on a kitchen counter can be transformed into a product shot on a luxury marble vanity.
The benefit here is the professional appearance it gives to small brands. You no longer need a studio, expensive lighting rigs, or a professional photographer to get great results. This levels the playing field for entrepreneurs who are just starting. They can create a cohesive brand look across their entire website without spending thousands of dollars on photoshoots.
Consistency is another major benefit. If a brand sells ten different types of candles, they can use the same AI-generated background for all of them. This makes the product catalog look organized and professional. It also allows the seller to update their visuals for different seasons. They can take the same product photo and add autumn leaves or winter snow in the background with just a few clicks.
Practical Workflow for Image-to-Image AI
To get the best results, creators follow a specific workflow that balances human creativity with machine efficiency. It is not just about clicking a button. It requires a bit of strategy to get the exact look you want.
| Feature | Traditional Workflow | AI-Enhanced Workflow |
| Initial Concept | Manual sketching | Sketch or reference photo |
| Revision Process | Redrawing from scratch | Adjusting prompts and strength |
| Time to Finish | 10 to 20 hours | 15 to 30 minutes |
| Skill Requirement | High technical mastery | Creative direction and basic logic |
| Output Variety | One or two options | Dozens of variations |
First, you need to start with a clear base image. This could be a rough sketch, a photo you took on your phone, or even a simple 3D model. The AI uses this as a map. If the base image is too messy, the AI might get confused. It is often helpful to use clear lines or distinct colors to help the software understand the different parts of the image.
Second, you must write a descriptive text prompt. The prompt tells the AI what style, lighting, and details to add to the base image. For example, if you upload a sketch of a forest, your prompt might be “lush tropical jungle, cinematic lighting, hyper-realistic, 8k”. The combination of the image and the text gives the AI a clear direction.
Third, you adjust the strength or influence setting. This is a crucial step in the process. A low strength setting means the AI will stay very close to your original image, only making small changes. A high strength setting gives the AI more freedom to change the shapes and colors. Finding the right balance is key to getting a result that looks like your original idea but with much better quality.
Finally, you can use the built-in editing tools to refine the output. Sometimes the AI might add an extra finger or a strange shadow. You can use an eraser or a brush tool to fix these small errors and then run the image through the AI again to smooth everything out. This iterative process is how professionals get those perfect, high-quality results.
Common Mistakes to Avoid
Many beginners make the mistake of using a prompt that is too short. If you only type “a cat,” the AI has to guess everything else. It is much better to describe the environment, the mood, and the art style. Mentioning things like “oil painting” or “neon lights” helps the AI understand the vibe you are going for.
Another mistake is setting the image influence too strongly. If you do this, the AI might completely ignore your original sketch and create something totally different. If you want to keep your composition the same, keep the strength setting in the middle range. This ensures the AI respects your original layout while still adding its own creative touch.
Finally, do not expect perfection on the first try. AI art is an iterative process. You might need to generate five or ten versions before you find the one that works. Each generation gives you a better idea of how the AI is interpreting your prompt and your image. Use each result as a stepping stone to the final piece.
Conclusion
Using AI tools has changed the way creators think about their work. These platforms do not replace artists. Instead, they act as a powerful assistant that handles the repetitive and time-consuming parts of the job. Whether you are designing characters, planning a room, or selling products online, these tools provide a way to work faster and more creatively. By combining human vision with machine speed, creators can push the boundaries of what is possible in digital art. Using these new methods allows anyone to turn a simple idea into a stunning visual reality without the traditional barriers of cost and time.
Lynn Martelli is an editor at Readability. She received her MFA in Creative Writing from Antioch University and has worked as an editor for over 10 years. Lynn has edited a wide variety of books, including fiction, non-fiction, memoirs, and more. In her free time, Lynn enjoys reading, writing, and spending time with her family and friends.